Welcome To Home Learning From Birth

Welcome To Home Learning From Birth

Wednesday, April 6, 2011

Volcano Dino Land

Dinosaurs are a popular part of Montessori lesson plans. To engage in some dinosaur discussions i made up this Dino land. The base is a terracotta pot plant saucer which i covered in fish tank pebbles. For the volcano you will need a plastic bottle and some sand. Then add some plastic dinosaurs

For our little science experiment we used a funnel into the plastic bottle and added about 1/2 cup of Bi-carb soda and a squirt of dish washing liquid. Tara also requested red glitter!
Make up a bowl of vinegar mixed with food colouring (we chose red). Use a baster or medicine dropper to add into your volcano and wait for the chemical reaction to start and you have an erupting volcano with bubbly red hot lava
You control the lava with the amount of vinegar you add

For more explosive lava just pour a cup full of the vinegar straight in. Watch out dinosaurs!!!!!!!!!!

Coconut Grass Farm

This play farm is made with shredded coconut and green food colouring. Use a zip lock bag to put all your coconut in-a great opportunity to practice those transferring skills Add some drops of green food colouring
And squish/pat/rub with your hands until all the coconut is covered
Find a tray with deep sides. Even an oven tray will make do! Lay out the coconut flat and put in the sun to dry for an hour
Set up your farm using animals,tractors,fences and a pond
Have some little rakes and shovels handy so the "farmer" can work on his/her property. Very therapeutic-a new take on a zen garden!


Tuesday, April 5, 2011

Fruit Loop-Sand Bottle

My husband and i used coloured sand in our wedding ceremony and kept the huge sand art bottle in our closet and when Tara stumbled across it the other day we decided to make her one of her own. Coloured sand is often quite expensive and hard to come by so why not make your own. Fruit Loops make great sweet smelling sand that has lovely stand out colours! Firstly divide the colours into separate containers then transfer them into a mortar and pestle and grind away until they are as fine as sand. If you don't own a mortar and pestle you can place the fruit loops into a snap lock bag and cover with a facecloth and use a small hammer to squash them. Then grab a small clear bottle and add a funnel to the top and pour in your coloured fruit loop sand, one colour at a time
Always keeping it upright and steady
Place a lid on tightly......
And you have a beautiful sand bottle decoration

Cushie Tushie poppers

I was given a few Baobag's https://www.facebook.com/baobag.co?ref=ts while pregnant with lots of goodies and samples in it and something that caught my eye was the Cushie Tushie https://www.facebook.com/cushietushies?ref=ts baby with mini cloth nappy on it. These tiny nappies come on and off by little poppers which are great for building muscles in little fingers and fine motor. They certainly get a work out at our house.

Paper Mache Hot Air Balloons

This project was started last year and had been a work in progress but finally thanks to Easter i was able to find the baskets i was searching for and we could complete it! With some blown up balloons we started paper mache by ripping newspaper strips and dipping them in a flour/water mix then placing them onto the balloon. We did about 4 layers of this It got very messy and turned into an unexpected sensory activity. The final product was left to dry for a few days
Once completely dry Tara painted hers red. We popped the balloon inside and cut around the bottom to allow us to get our hand inside
Then i used a knife to pierce a whole in the center top of the balloon, threaded some fishing wire through and tied it off with a button. This will give the balloon some strength to be able to hang up
At the bottom of the balloon i made 4 holes and threaded some rope though to attach to the basket. These are the baskets i was having trouble finding but check your local shops now and im sure you will find them stocked up for Easter.
My blue one was made slightly different with thin ribbon glued onto the paper mache and attached straight to the basket
And your hot air balloon is ready to take people for rides!
Eventually these will be put in the kids rooms, Easy and cheap room decor!

Bottle & Lid matching

I had been collecting all my little containers that had tiny lids like the samples you get in hotels or little eye creams. After i washed them all thoroughly i put them in a basket and waited for Tara to notice them on her shelf We placed them into rows of lids and bottles and then she chose a bottle and had to find the matching lid. This activity is self correcting and also helps with those fine motor skills

Fruit loop-Necklace

An oldie but a goodie! They are great for fine motor and you can keep a colour pattern throughout............ Fruit loop necklaces-Fun to make and fun to eat!!!!!

Easter-Cutter match

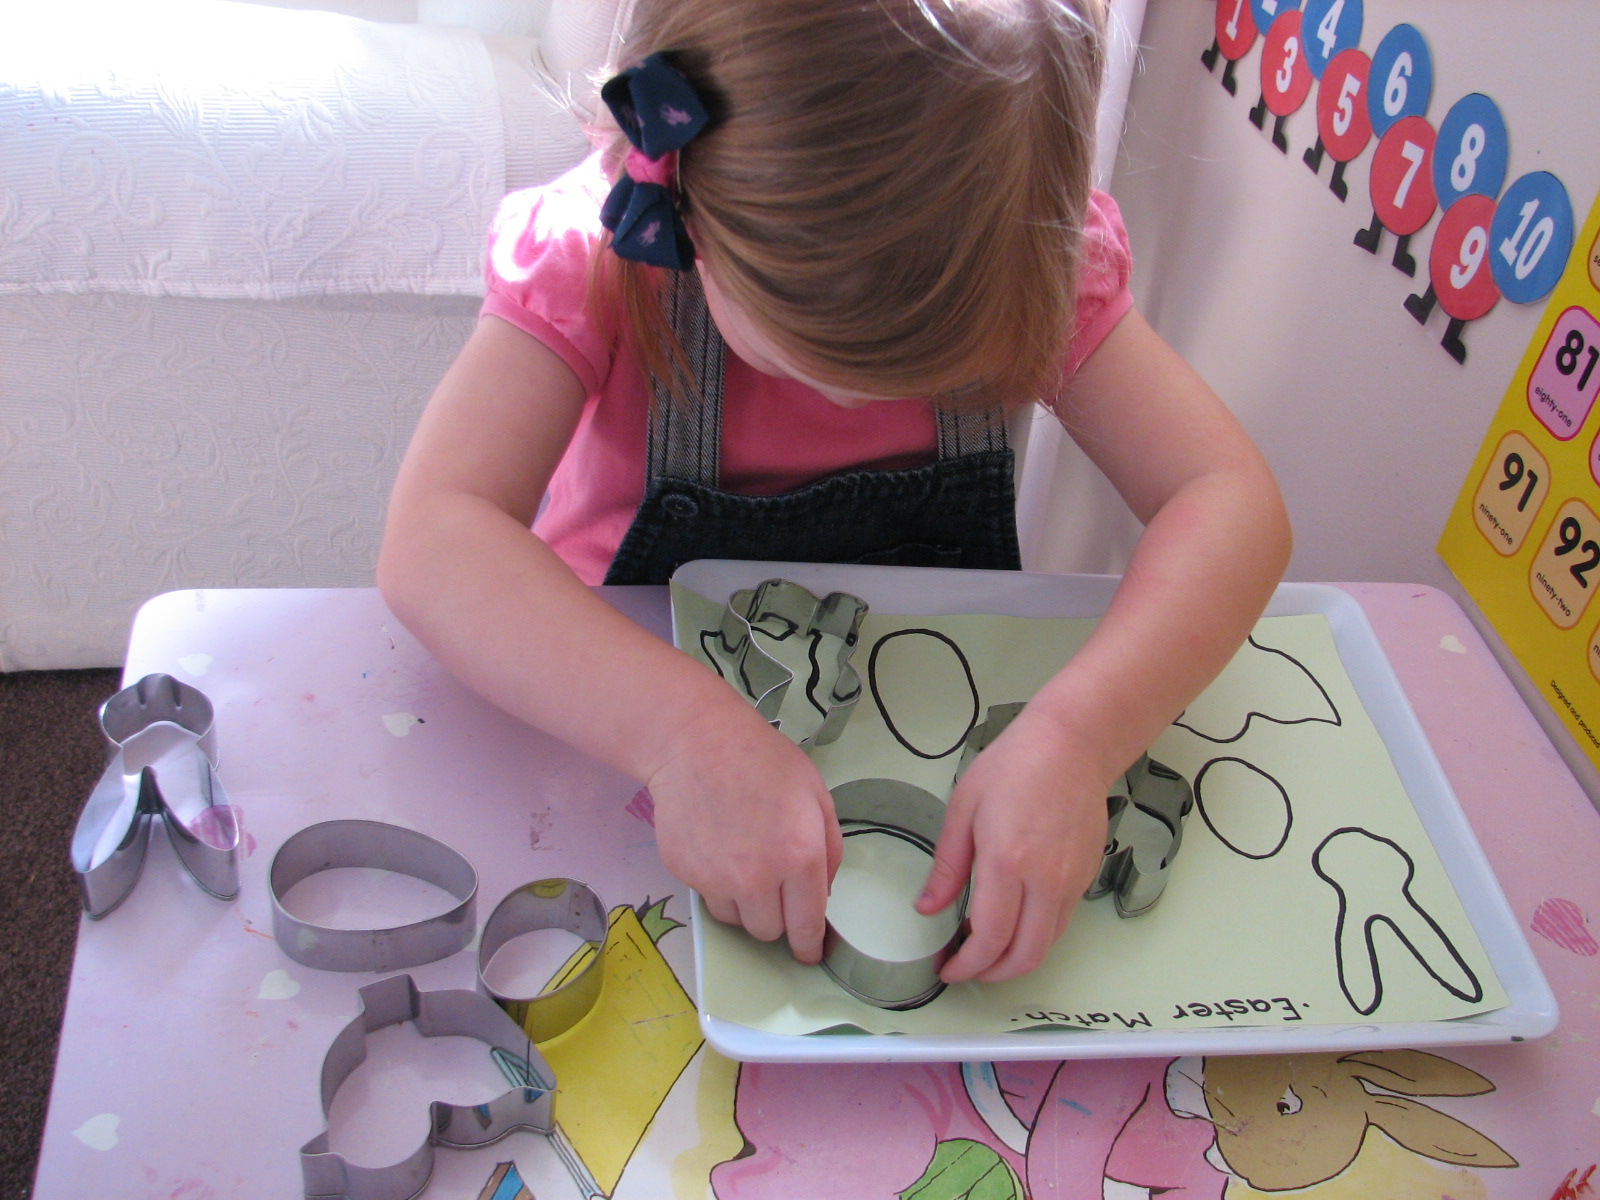
We have an Easter box of craft put away for each year and when i got it down last week i found these cookie cutters. While it isn't close enough yet to get busy baking ,i traced them with thick bold pen onto paper and Tara matched them to the outline You could even fill in the outline to match the "shadow"

Toilet Roll Designer Cuffs

I'm forever trying to come up with fun things to make with our mountain of toilet rolls so this was just one that kept us busy for an afternoon I set out a tray with paint,gems,stickers and glitter as well as a toilet roll cut in half length ways and sideways and Tara began to decorate......... Designer kids fashion cuffs ready to match to your next outfit!

Thursday, March 24, 2011

Newspaper Cubby

We love cubby houses but sometimes i just need my dining room table for dinner not for bedsheets!
This cubby can be left up to play with for as long as they need!
We saved newspapers for weeks for this!
Lay out your newspaper stack, gather 10 sheets and from one corner use a pencil to help you tightly roll them into tubes using sticky tape to hold. Repeat this 25 times. Use 3 tubes to make a triangle by stapling corners, make 5 triangles all up then make a star with the remanding 5 tubes.
While all this needs to be done by an adult there are plenty of jobs a little helper can do. Ask your child how you would make a triangle with 3 tubes and ask them to count out making sure you have 25 tubes

You may need help joining them all together but in the end it will look like this.. we used masking tape over the staples to give it more stability


Throw a bed sheet over the top and enjoy your cubby however you like


Tara had a lovely afternoon tea party with her friends


Gobbi Mobile

We don't have much free space in our house but i find it important to use what we have to benefit my children and this area was set aside for Mason in his newborn years to enrich his sensitive learning period of movement and language. I started with a mattress, soft but firm enough to support covered by a clean fitted sheet. A mirror that he can use to see his reflection during tummy time. Eeboo alphabet cards,some black/white books and a basket of sensory items that include silk,metal,wood,wool,plastic,bells,pine cone,feather and a ball. The highlight of this infant environment is the Gobbi Mobile.
While the Gobbi Mobile isn't actually a mobile it does however serve to engage a baby's vision as a mobile does.
Made of polystyrene balls wrapt in gradations of colour it invites an awareness of subtlety.Each sphere is lightweight enough to offer feedback to even the lightest touch or swing of an infants arms or legs while also the right diameter to fit in the palm of a baby's developing grasp

Our Gobbi mobile was handmade with love from the wonderful April from Nashville, U.S.A-check out her store for more Montessori materials
http://www.etsy.com/shop/goosedesigns


From which ever angle Mason loves his Gobbi!


Check out youtube to see a Gobbi in action!
http://www.youtube.com/watch?v=sgffB-st6Jg&NR=1


Toothbrush painting

After a visit to the dentist we swapped our toothbrushes for new ones and decided to use our old toothbrushes for some fun flicking painting.
Using different colours, Tara dabbed the toothbrush into the paint and the used her finger to flick the paint onto the paper. She told me it looked like the night sky-i agree!


Making Crayons

To make your own crayon designs you start by taking all the paper or labels off your crayons which took very fine motor skills and concentration to do-fabulous activity for busy toddlers!
Cut crayons into "pea" sized bits and place in your favourite moulds. Cheaper crayons work well for this don't waste your washable type crayolas as they seem to leave a oily film layer on top.

Fill them up to 3/4 way to the top and place in oven on 75 degrees Celsius for approx 15 mins or until melted

After they are melted leave them on the bench to cool then put them in the freezer for a few hours. Pop them out of the moulds and you have your own unique crayons, great size for toddlers and fabulous party favours!


Size sequencing fishing

Did you know pipe cleaners are magnetic? We made this fishing game of all different sized fish that were made by twisting pipe cleaners into a fish shape. Using a magnet rod from a puzzle we had, Tara caught a fish...
Then arranged the fish she caught in order of smallest to biggest