Where do you put your child's creative pieces? On the fridge? In folders? In frames in their rooms? In the playroom?We chose our hall to display our children's work. Yes, our visitors may think we are a little nutty and may prefer to look at a mainstream artists painting but sense of pride Tara feels when she adds another piece to her collection is well worth it. Our hall has been renamed "our art gallery" and we must use quiet voices to discuss any of the artworks. Its a little silly and a little fun but these little choices help build the important self worth of our next generation.
What says a traditional Aussie Christmas more than bottlebrush with red and green colours? Painting using a bottlebrush was just another way to reinvent a simple activity into something new. Lovely idea for Christmas paper or cards too!
Sick of boring candy cane gifts for friends? Well this year we gave out these cuties! Made with 8 maltesers and 1 jaffa, they got a smile from all of Tara's classmates. Here is a similar label that the folks at Pigeon have handed out free so print these off as many times as you need and get to work sorting your treats-great activity for the kids to get involved in to practise counting,sorting and of course not EATING!http://www.pigeonbaby.com.au/pigeon/reindeerNoses.pdf
Looking for a healthy Christmas lunch idea for the kids? This reindeer sandwich should do the trick!Toast one slice of bread, while waiting get two slices of bread and make your favourite filling sandwich. Cut off the crusts and round the corners with a knife. With another slice of bread cut out a "B" shapeSo starting with the normal square sandwich you made place the "B" shape facing down on the end of the sandwich to act as the cheeks. put a red cherry tomato on top for the nose. Cut out two small cheese slice circles and add olives/sultanas or red grapes as eyes.The toasted slice of bread are the antlers so once toasted cut using scissors into a twisted antler shape. Add ears by cutting out shape from leftovers and add a coloured spread on top. Lastly the tongue can be made with a cucumber or as we used slice of cabanossi. Proud as punch of her Christmas lunch!
Object Permanence is a Montessori principle that is often shown in the 9-12 month age group. Working in child care you often find around this age children become "clingy" or not wanting their caregiver to leave their sight. Giving Mason the opportunity to explore these Object permanence boxes reinforces that even though you may not see something it is still there. As he drops the ball into the hole, he looses sight of it and has to open the draw to find it. This focus' on his hand eye coordination,fine motor skills and starts the process of his memory understanding object permanence.
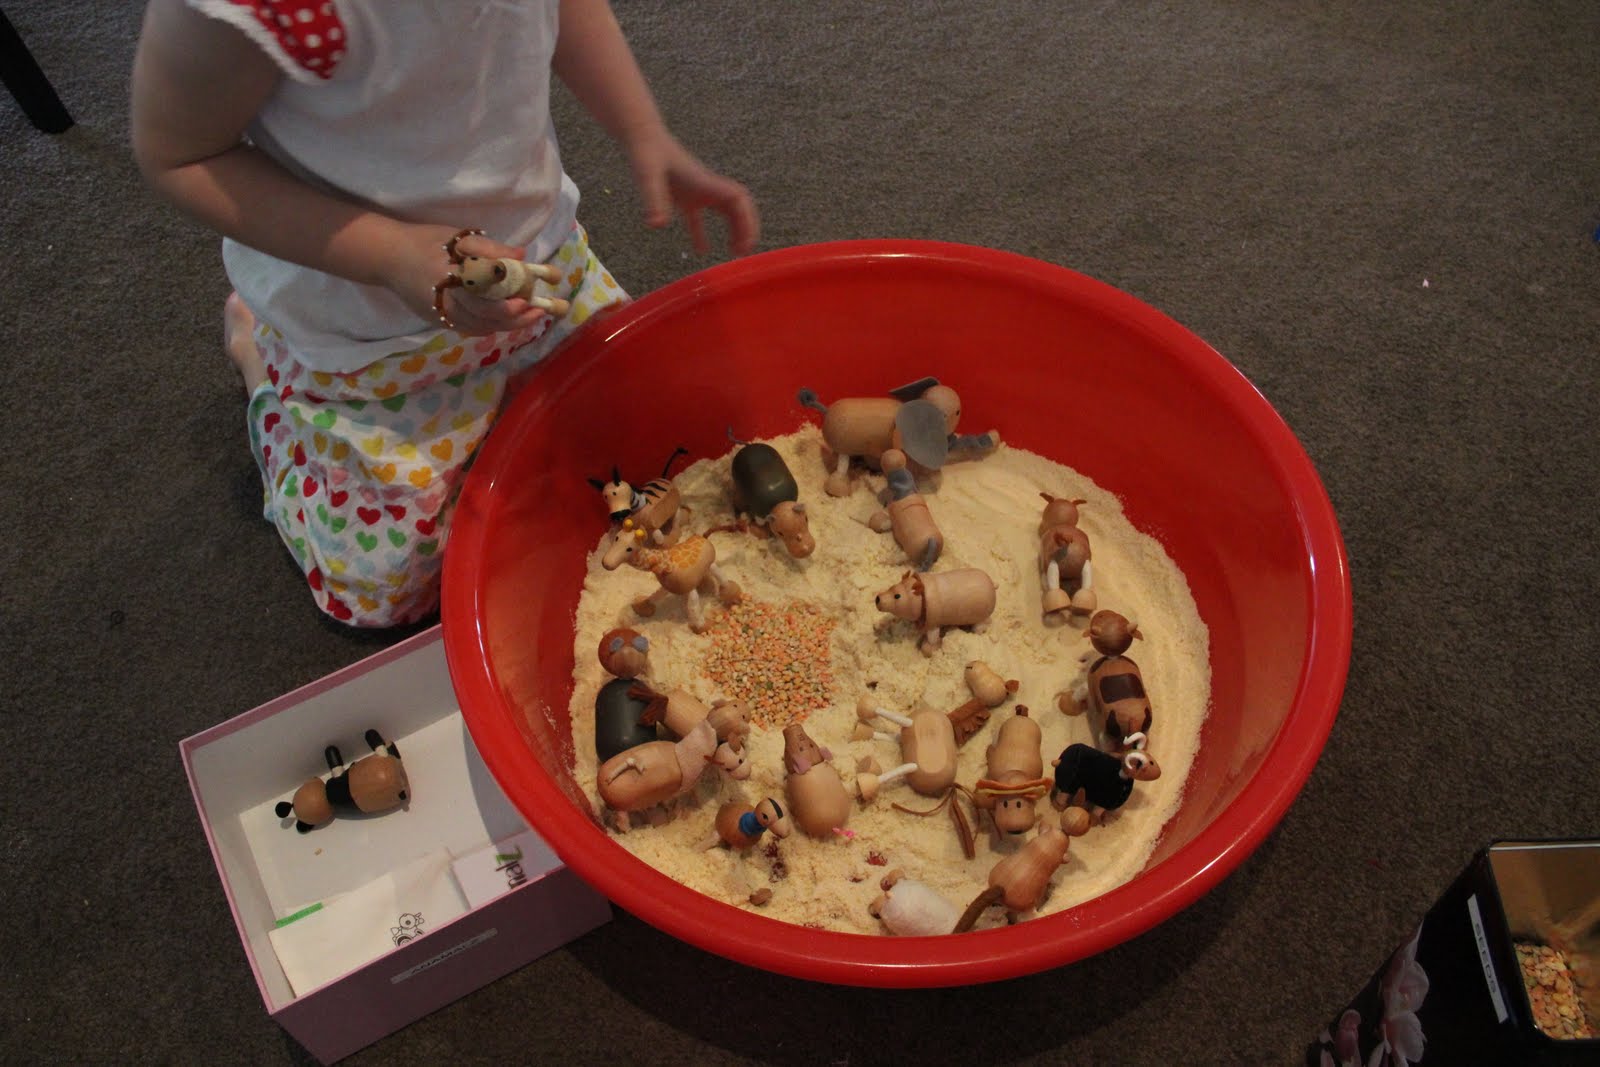
Our almond meal was reused in many other activities. Here Tara made her own desert habitat with seeds and Anamalz.Not only are these sensory tubs/animal habitats fun to explore they also bring up so many opportunities for language skills. We may never have been to a real desert but we spoke about dunes, made our own in the almond meal and what animals may be there. Mason also had a go at the desert tub. All the fun and not having to worry if he ate a fist full or two!
 This tub was our beach scene. Some paper umbrellas,wooden people and some cool water-made with blue jelly. Talking about swimming in between the flags, keeping out of the sun, digging in the sand to find water, and sea creatures were all topics we spoke about while role playing in our beach!
I found some almond meal in the pantry that was out of date by just a month so i decided instead of throwing it out we would use it in our activities. This was a Montessori sand tray which i made with a baking tray and plain almond meal. I put a pack of flashcards next to Tara and she copied the letter using her finger to move the almond meal. Almond meal is also known as almond flour or ground almond. It has a similar consistency to sand so works well for this activity. 
We were having some guests over for a play date so decided to make a healthy snack to enjoy. Tara cut up all the fruit herself, peeled some mandarins and added some mini marshmellow treats to make.... A stunning fruit rainbow! Great for St Patrick's day or a rainbow party. For a healthier option exchange the marshmellow "pot of gold" for dipping yogurt.
What can you do with a bunch of sponges????? Sponge towers!! This tower turned into a game of "Colour Jenga". We both had a colour of our choice and the aim was to take out our own colour piece without the tower falling over. Great for hand eye co ordination, fine motor skills and taking turns.
I have fond memories of making perfume when i was a little girl so when Tara was choosing Roses to cut i jumped at the chance to show her how to make her own.After cutting her roses off the bush, we sat down and pulled each petal off the stem and ripped them up to release all the sweet smells.I filled a glass jar up half way with HOT water. Tara gently placed the all petals into the water and replaced the lid. We let the jar steam for half a day or until the water is cool. Take off the lid and use a strainer to strain out the rose petals and you are left with sweet rose perfume water Dab on your wrists and behind your ears to keep you smelling as sweet as a rose!
Want to make glow water but you don't have a black light?? This method creates a great glow in the dark effect even in daylight. Grab a yellow highlighter and snap it open to reveal the sponge which holds the dye Take this sponge out and cut the plastic open.
 Place the sponge in a jar of water, put the lid on and let it soak for 24 hours, shake it every so often. The effect is amazing.It truly glows. The more highlighters we added the more vibrant it became. This glow water is purely water and highlighter ink so it is non toxic to play with and will wash off hands.
The options are endless with glow water,check out our other posts for a few things we created with it
We loved our glow water so much we thought why not try making some playdough with it. Using 1 cup of cornflour and 2 cups of water i mixed it and placed in the microwave for 3 minutes. It became a hard thick layer of dough. I added a touch more glow water and kneaded it until it formed a ball. Such a simple recipe, no stove top needed and i was really happy with the outcome. Easy to mould and soft enough for little hands
 Tara got to work making some glow stars for halloween
What do you get when you mix glow water with cornflour? GOOOOOThis recipe was just cornflour with cold glow water stirred until thickened. This was the start of making playdough before i microwaved it but Tara saw that goo and wanted to explore it so we added some spiders and other creepy crawlies and she had a blast.It is sticky,gooey and gets everywhere but the ingredients are all washable,non toxic and so much fun. Tara made some hand prints on our pavers outside which look super creepy at night!
Tara was kind enough to involve her little brother in her Halloween activities by making him his own glow bottle.With an empty plastic drink bottle, she filled it with some of her glow water, not too full, so then it would make a lovely swishing sound when moved.  Then she searched for some things to put inside it....some green fruit netting off our apples, some coloured balls for rattling and some coloured match sticks
  Now Mason can enjoy the fun of Halloween while exploring his own glow bottle
A fairy garden has always been on my to do list so when the beautiful spring weather arrived we went planning our garden design, Tara quickly assured me it would be a smurf village not a fairy garden so i followed her lead and she helped me create a one of a kind smurf village. We used a saucer from under a pot plant and rested it on a stump. Make sure the saucer has a draining hole and fill up with soil. We added some ground cover greenery that will hopefully spread and can be cut back with scissors by your little gardener. To create a bridge we used twine to connect some twigs together to form a plank then placed it over some blue gems. Our toadstools are corks painted white/red with puffy paint white spots. We found a bird nest hut from Bunnings and some coloured bonsai pebbles to add to the village. Tara remembers to water the village every day with a spray bottle i leave next to the garden. Lovely to see her enjoy hours of outside imaginative play together with the Smurfs.